
Tome of Dungeons Map Gallery
Greetings, Human! You've just stumbled upon the secret vault of the Tome of Dungeons gallery, a mysterious labyrinth brimming with meticulously crafted D&D 5e dungeon maps. Here at MeditatingMunky.com, we've conjured up a fantastical array of environments, from the sneaky waterfall bandit camp of Deathmist Vault to the time-bending steampunk vibes of the Vault of Duality.
Each map in this collection is a magical portal, whisking you away to epic encounters and thrilling explorations. Will you decipher the cryptic runes of the Shattered Chapel? Or dare to tread the icy corridors of the Frozen Abyss? These maps are designed for only the bravest of adventurers.
Designed to challenge all levels of gameplay, from fledgling level 1s to legendary level 20s, these maps are more than just pretty pictures; they're your passport to adventure, your key to unlocking the imagination, and your ticket to tales that will be told for generations. So, strap on your boots, grab your compass, and let the adventure begin!


Deathmist Vault
Venture into the Deathmist Vault, a once sacred garden turned bandit hideout. This ancient druidic sanctuary, now overrun by the nefarious Crimson Claw, holds deadly secrets and vile experiments. Navigate through the bandit-infested garden, explore the bustling Compound, and dare to trespass into the forbidden Vault. Will you outwit Xavia and her Ogre bodyguard The Butcher, or become the next subject of her twisted experiments? Step into the dungeon and discover the chilling beauty of the Deathmist Vault.


Shattered Chapel
Step right up, brave adventurers, and behold the Shattered Chapel! Nestled in the rugged Ragna Mountains, this forgotten temple is a puzzle box of deadly traps, ancient secrets, and a sleeping sentinel known as the Runestone Golem. Guarded by stone monoliths etched with cryptic runes, it's a treasure trove that's caught the eye of the local goblin tribe, The Kazdoffs. Will you outsmart these pesky goblins, solve the chapel's mysteries, and awaken the mighty Atma, the Runestone Golem? Or will you fall victim to the traps and become another forgotten tale? Dive into this dungeon and unravel the mysteries of the Shattered Chapel!


Lost Temple of Lazaar
Greetings, human! Venture into the heart of the Vuexl Rainforest and behold the Lost Temple of Lazaar! This ancient ziggurat, once a beacon of harmony, now echoes with the whispers of a devilish influence. Will you navigate the treacherous traps and tiered levels of the temple to uncover the truth about the devil Malfesius? Or will you fall victim to the cunning Lazaar and his lizardfolk tribe? Climb your way through this dungeon and experience the thrilling saga of the Lost Temple of Lazaar. But beware, for every sacrifice brings the devil closer to freedom!


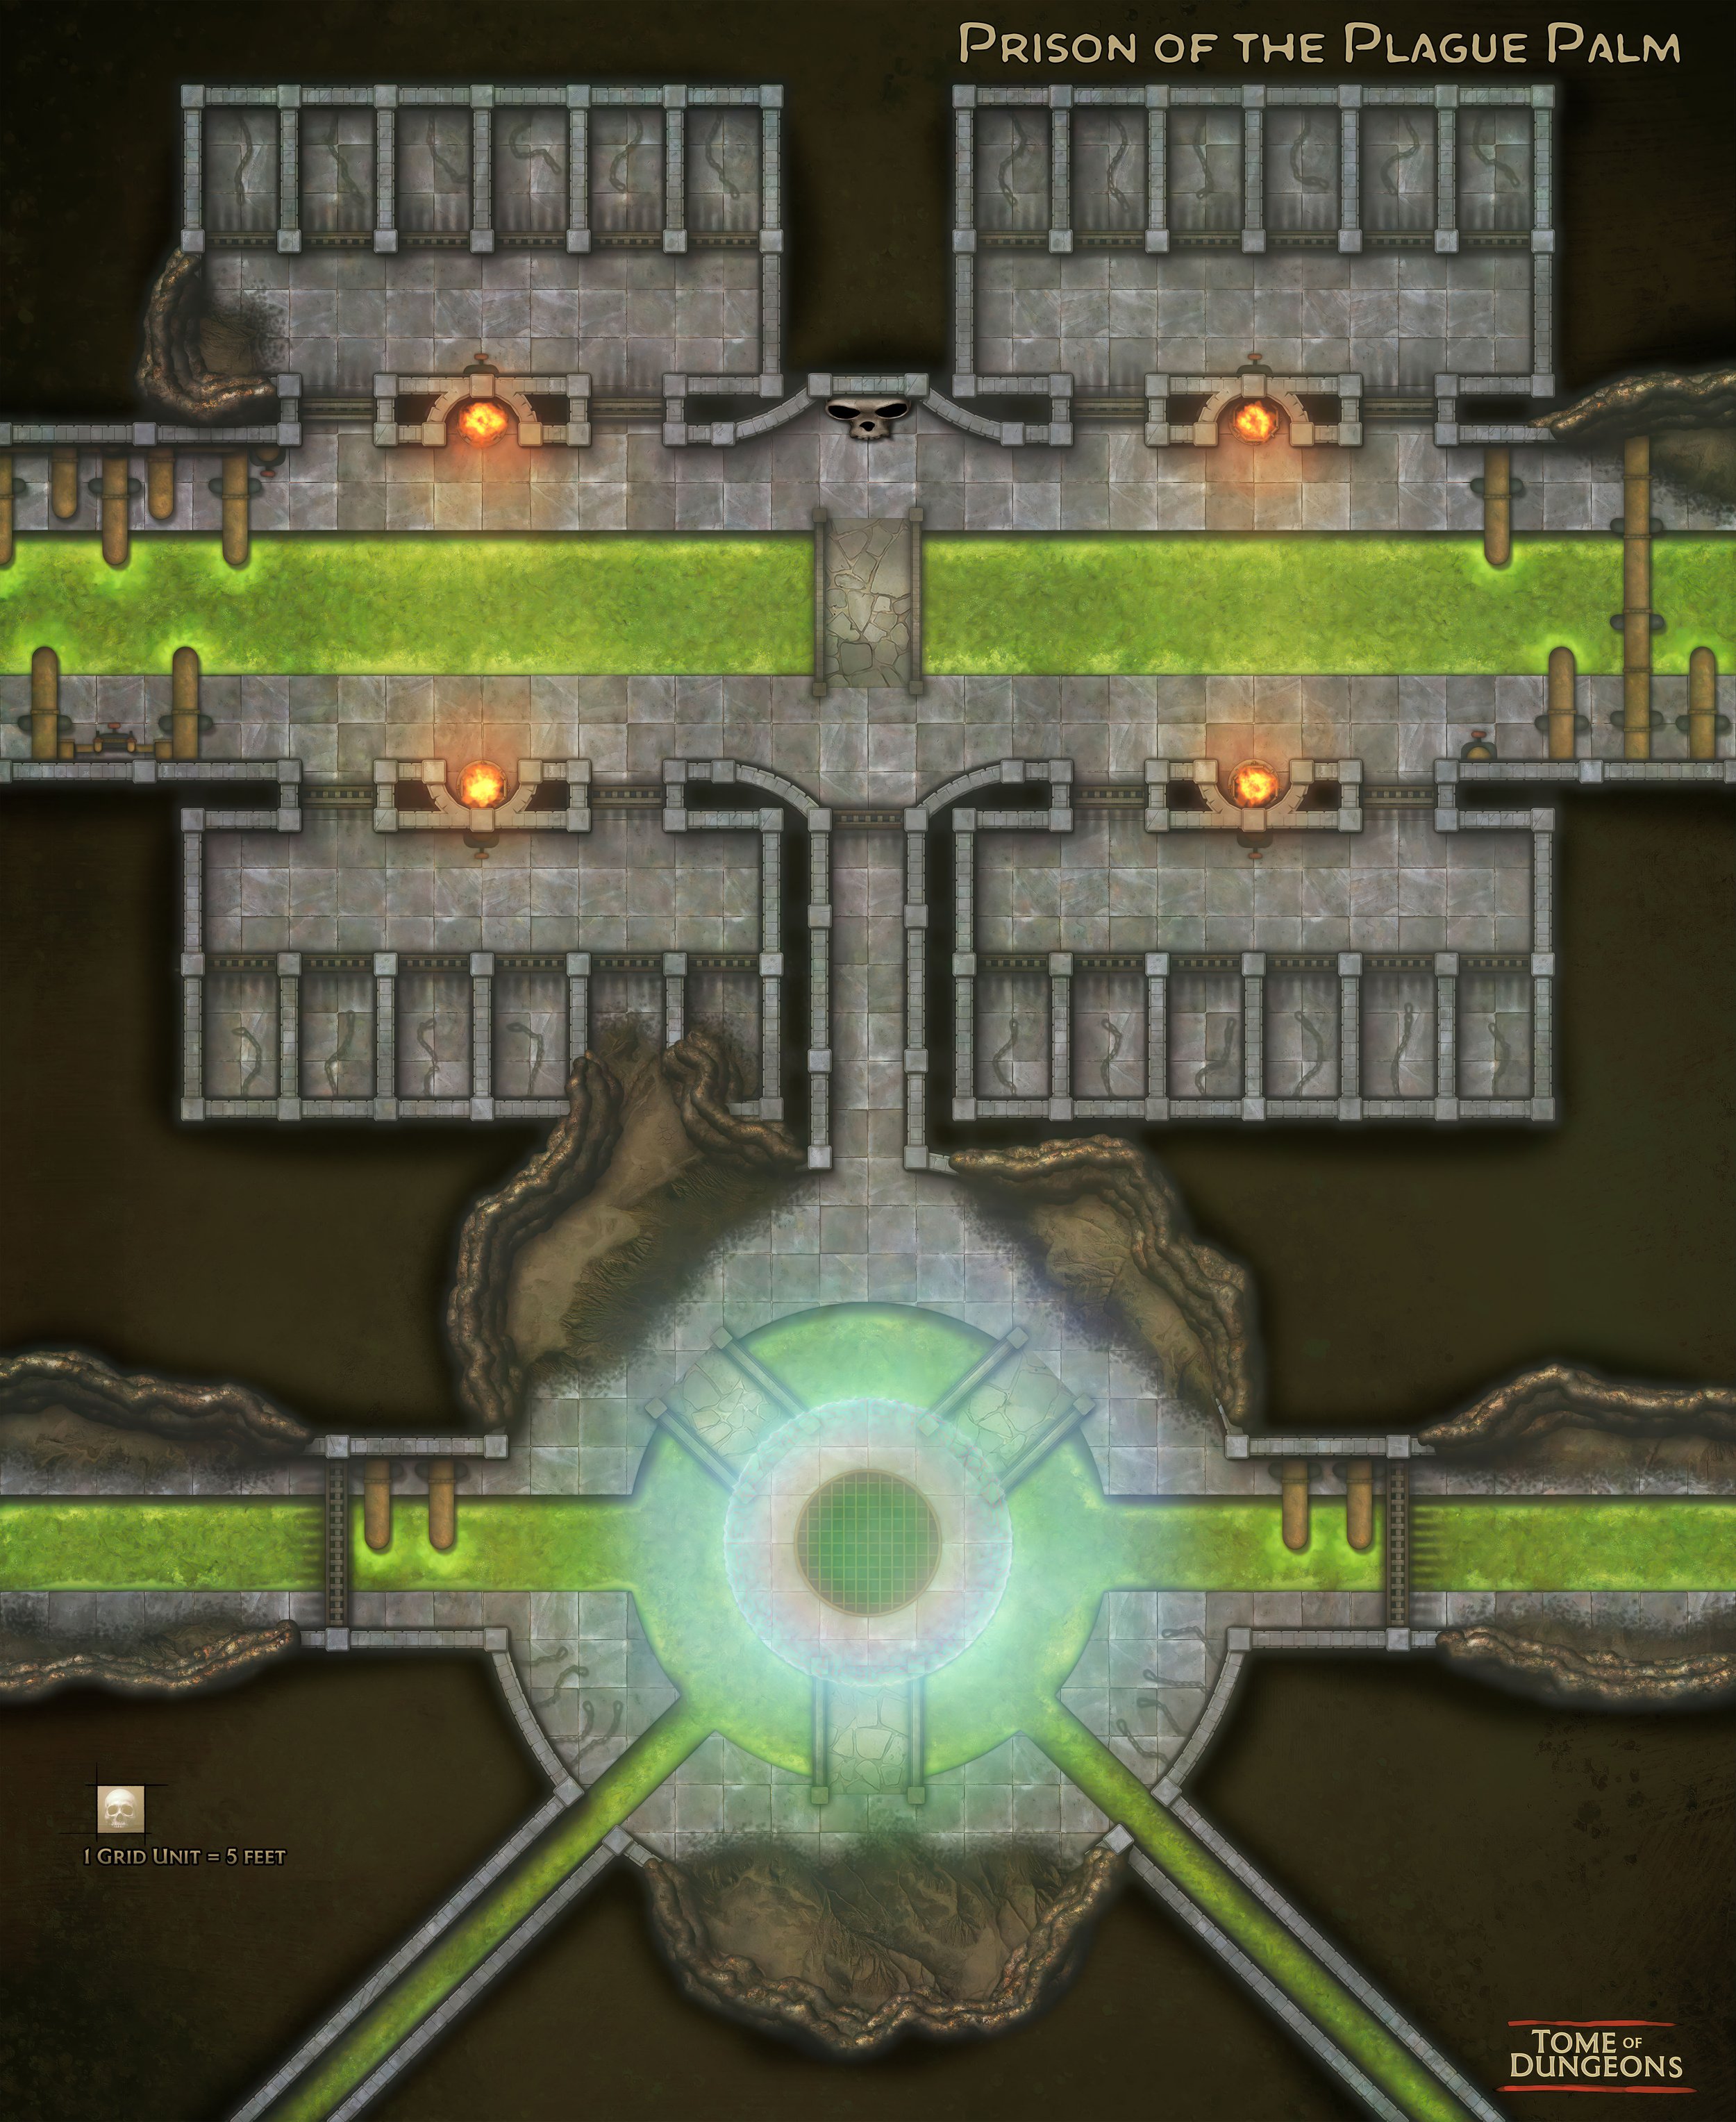
Prison of the Plague Palm
Welcome, to the underbelly of Ravenlaw, the Prison of the Plague Palm! What starts as a simple 'rats in the basement' task at the Silver Sparrow tavern quickly descends into a labyrinth of filth and danger. Navigate the rat-infested cellars, traverse the treacherous sewers, and confront the growing army of mutated Ratfolk. Will you survive the traps and cleanse the sewers? Or will you fall prey to the Plague Palm leader and his Army of Filth? Slip into the grimy depths of the Prison of the Plague Palm!


Hellfist Monastery
You have arrived at the hallowed halls of the Hellfist Monastery! Once a bastion of divine power, this ancient dwarven stronghold now teeters on the brink of darkness. Battle your way through the undead-infested fortress, delve into the catacombs beneath, and face the demonic forces that threaten to consume this sacred place. Will you banish the restless spirits, lay the dwarven souls to rest, and renew the pact with the goddess Avaena? Or will you succumb to the evil known as the Demodorf that stirs within these ancient walls? March your way into this dungeon and experience the fiery trials of the Hellfist Monastery!


Frozen Abyss
Investigate the mysterious disappearance of whales from the nearby fishing village of Yinsh and delve into the depths on a chilling journey into the Frozen Abyss. In the icy wilderness of The Lost Isles, an expelled yeti named Gurol forms an unlikely alliance with the frost dragon Eirwen, leading to an unusual power dynamic within the frosty depths of the abyss. Your quest will lead you to the heart of the Frozen Abyss, where you will navigate through frost-ridden caves, confront a sentient captive whale, and ultimately face the unique rulers of this icy enclave. Will you survive the frosty trials of the Frozen Abyss or succumb to the icy grip of the dragon and the enlightened yeti?


Sands of Decay
Venture into the Ashmazar Desert and brave the Cursed Lands of Zandreth in the Sands of Decay. Unearth the Temple of the Beast, once the stronghold of the lich lord Zandreth's lieutenant, Vol'droth. Face the undead, navigate through the temple's treacherous confines, and confront the enormous sandworm Cai-avood. Will you survive the beast's insides and escape, or will you become another lost soul in the shifting sands?


Ancient Ruins of Xune and Zoan
Ascend to the skies and explore the Lost Ruins of Xune and Zoan, a floating island temple once dedicated to the twin serpent gods. Unravel the mystery of the missing Lord Dumptleton and his crew, and face the elemental avatar of earth and air that lurks within the temple's sanctum. Will you rescue the nobleman and escape before the island crashes down, or will you be lost to the winds of time?


Eye of the magi
Set forth on a celestial journey in the Eye of the Magi. Ascend the tower of Skyfall Keep, the stronghold of the ruthless drow wizard, Magus Skylord. Uncover the secrets of his cosmic explorations and confront the horrors he has brought back from the shattered pieces of the Third Moon. Will you thwart his plan to shatter another moon and prevent a cataclysm, or will you fall victim to his arcane prowess?

Sunken Vault of Treasure Island
Embark on a thrilling journey to the Sunken Vault of Treasure Island, a cursed haven once ruled by the notorious pirate captain, Zia Lokae. Delve into the labyrinthine tunnels beneath Novaste Cove, filled with deadly traps, riddles, and monstrous guardians. Uncover the dark secret of Zia's transformation into an undead terror and her pact with the fallen god, Zethros. This dungeon will test your courage, wit, and strength. Will you be able to lift the curse and claim the legendary treasure, or will you succumb to the island's dark magic?


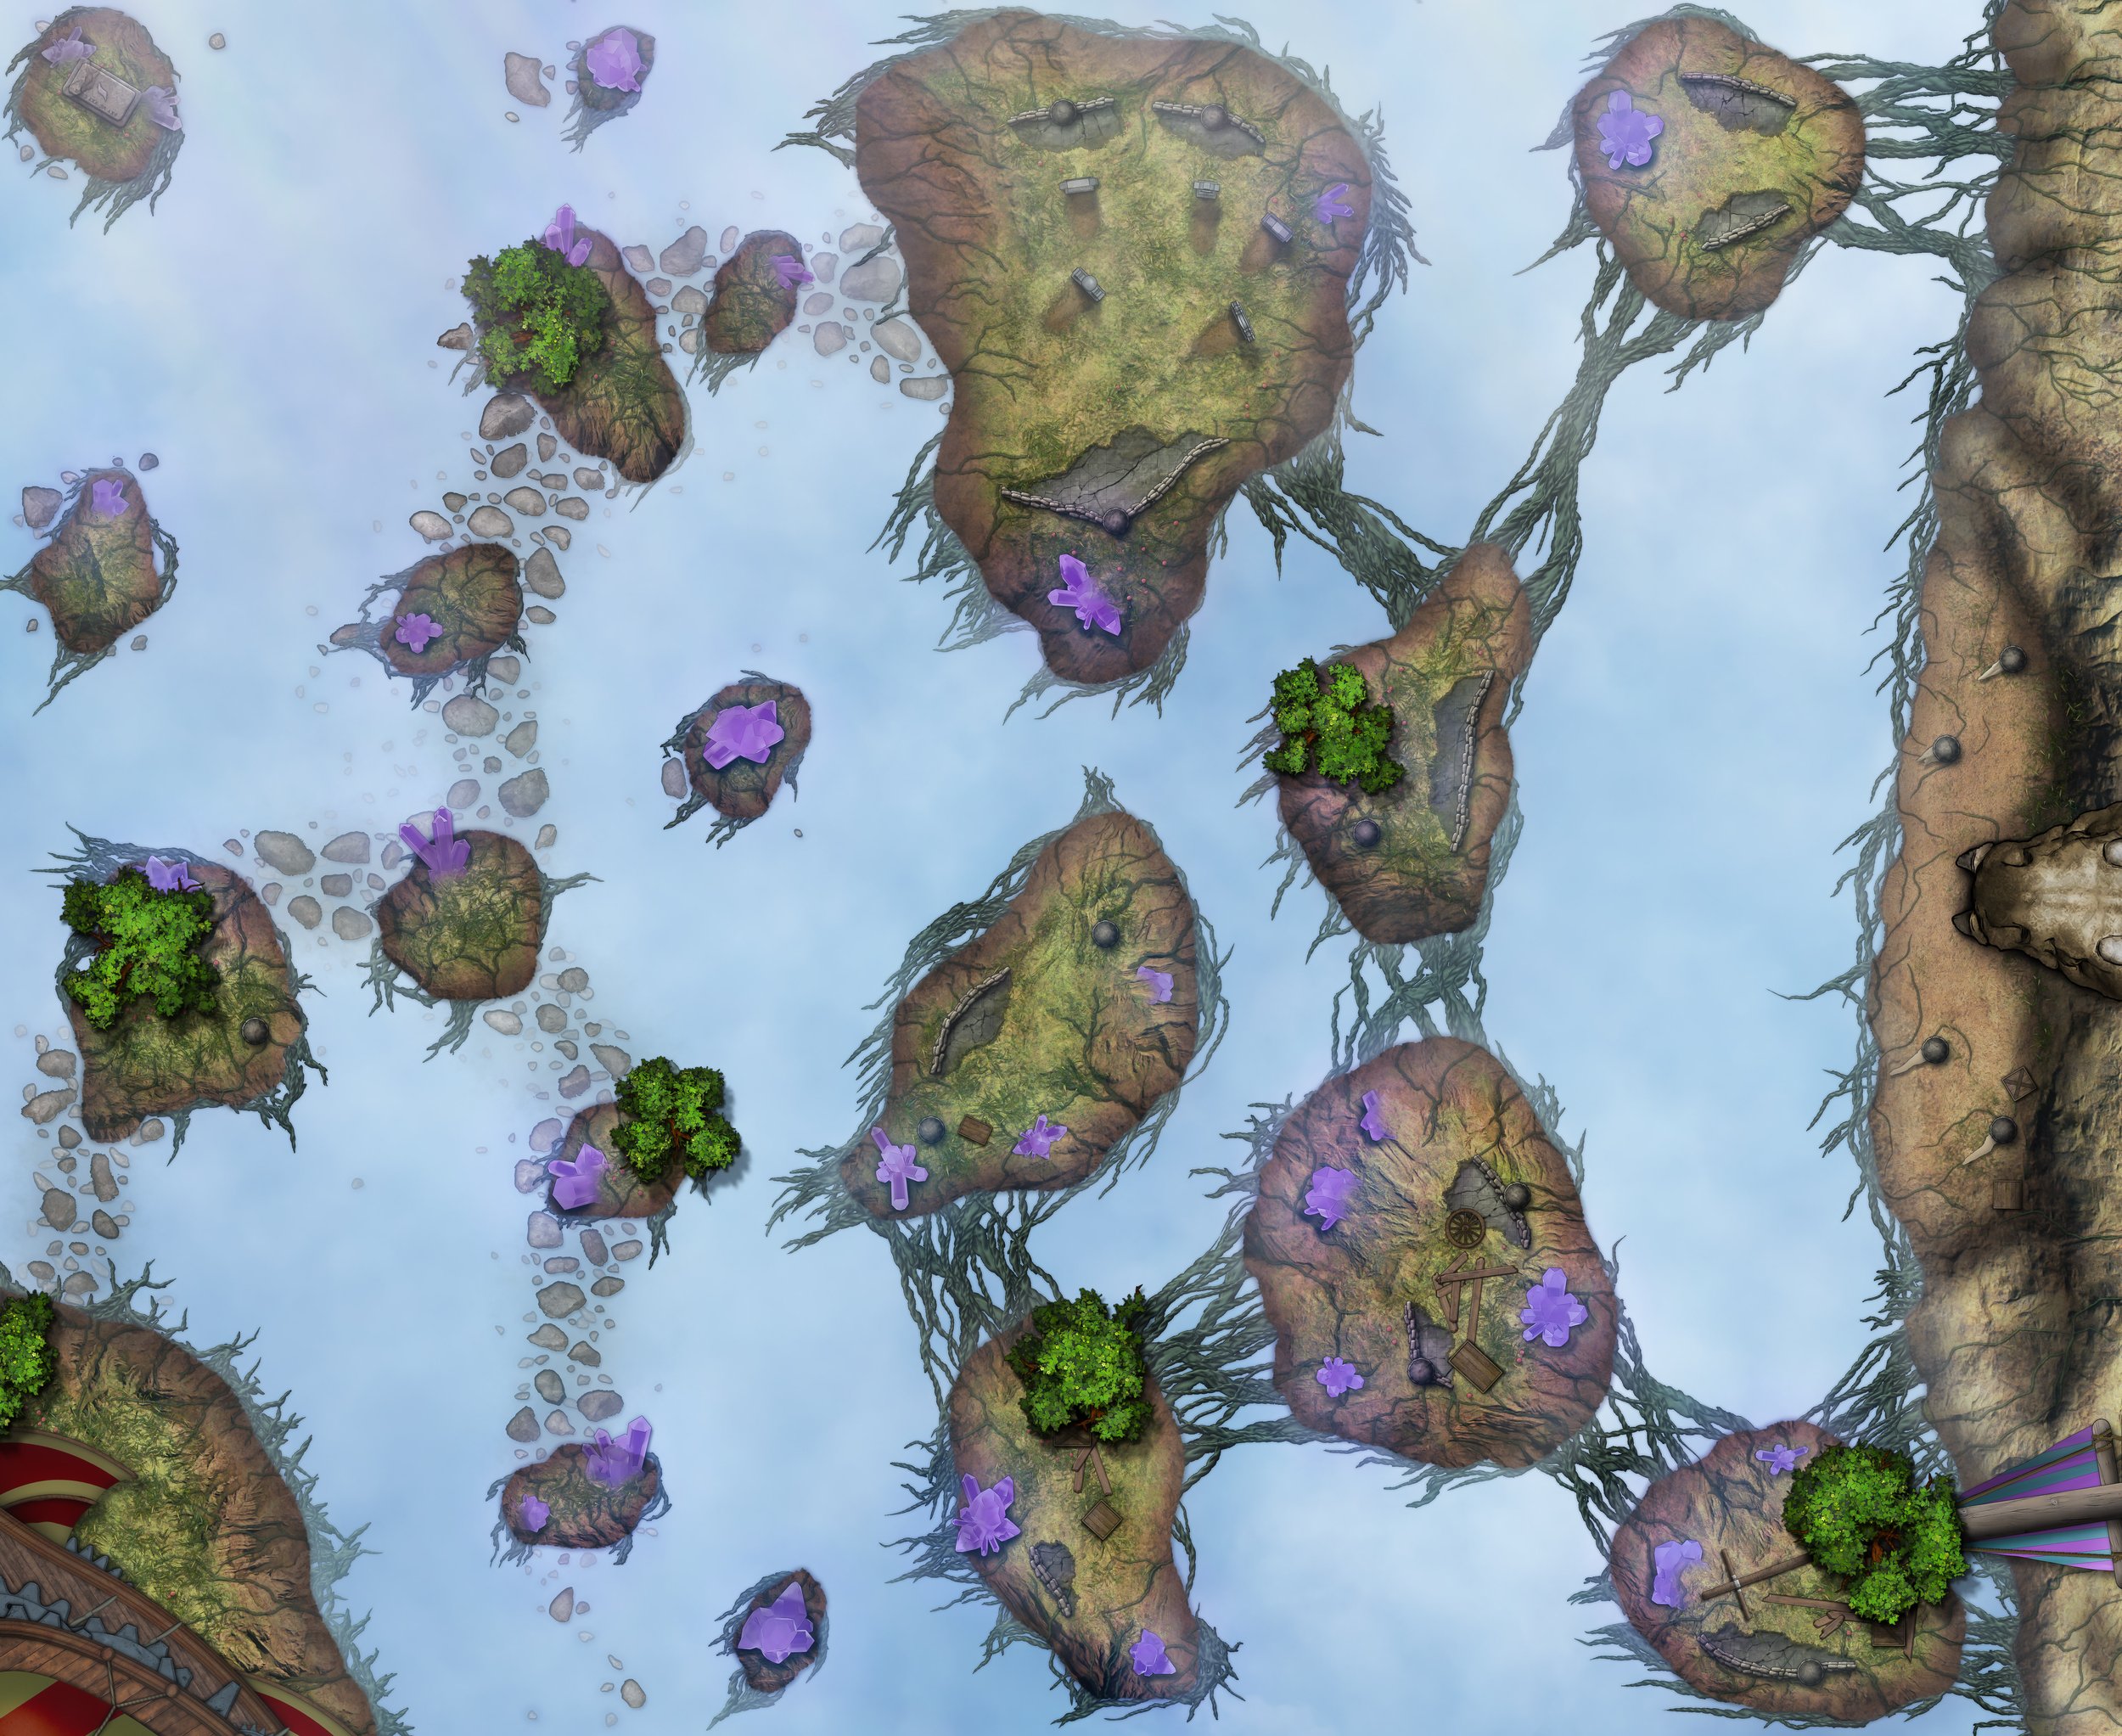
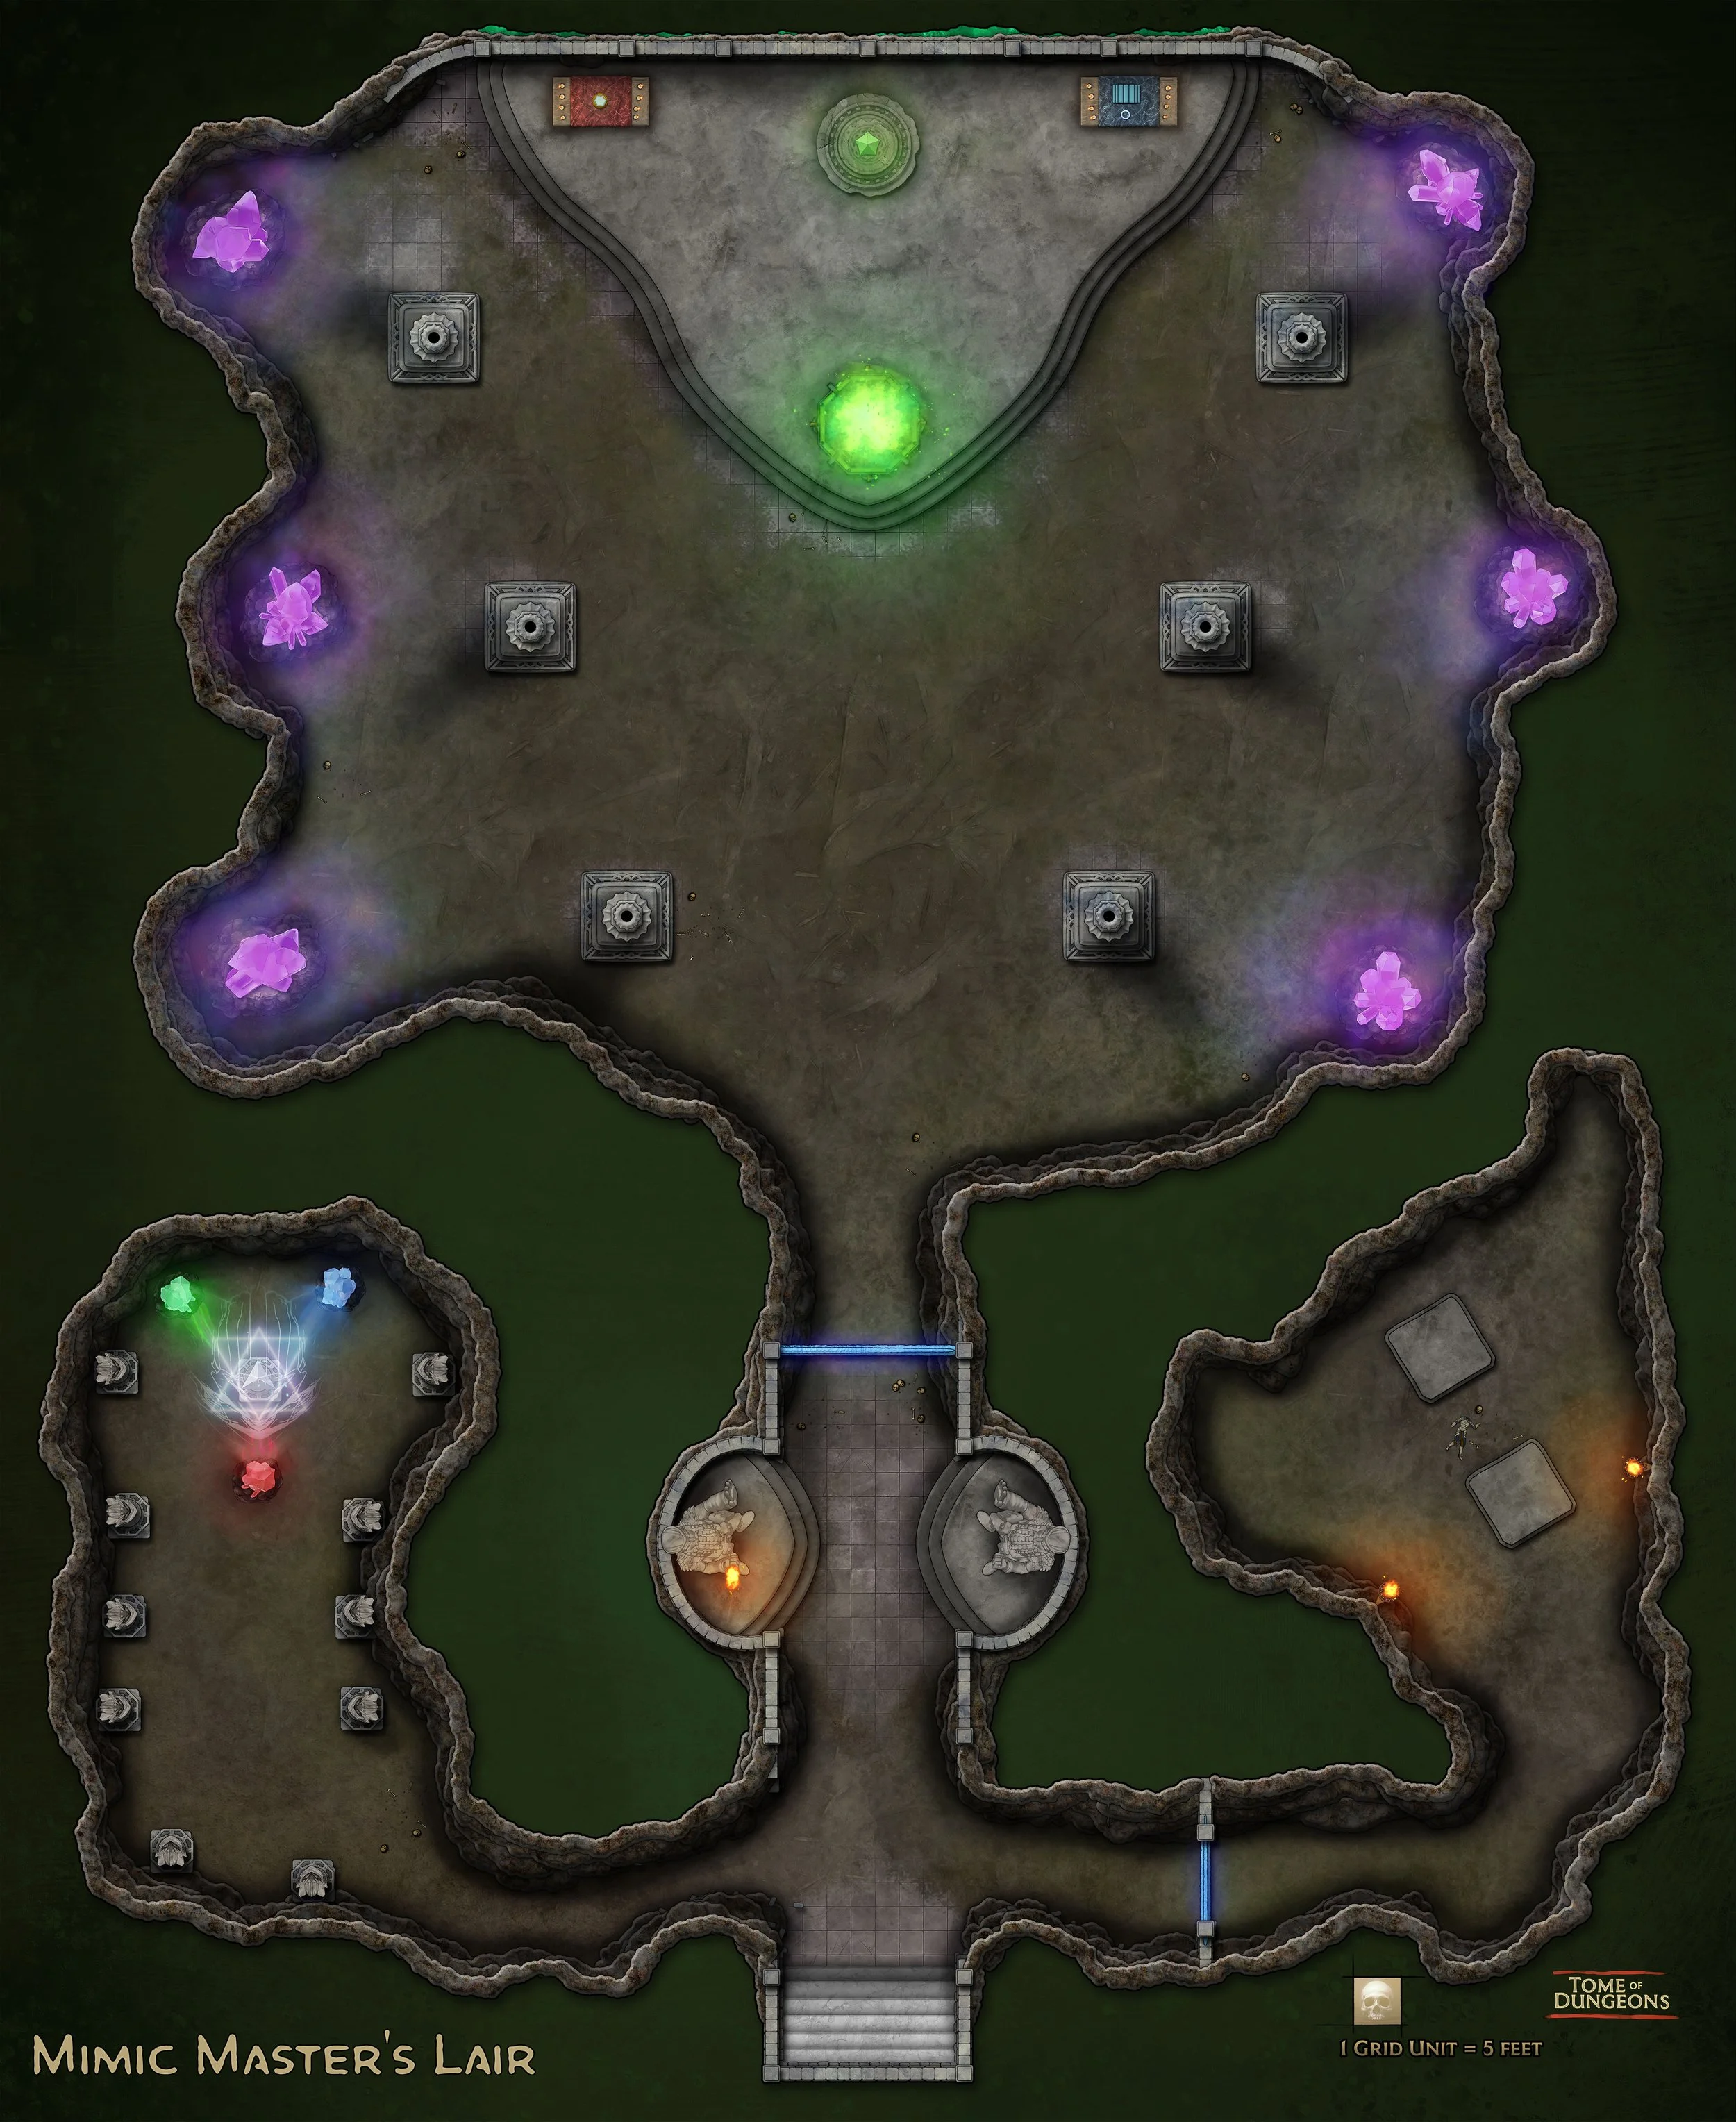
Illusionary Prison
Step into a realm of mystery and illusion with the Illusionary Prison adventure. This high-level dungeon crawl is designed for five 18th-level characters and can be seamlessly integrated into any existing campaign. The adventure begins with the characters finding themselves at a dinner party, with no memory of how they arrived. As the evening progresses, they realize that they are trapped in a mirror-like complex with doppelgangers of themselves. The adventure unfolds in three parts, with the characters navigating through a series of eerie rooms, facing off with the Mimic Master, and solving puzzles to escape this perplexing reality. The Illusionary Prison is not for the faint-hearted, with depictions that may be disturbing to some players and a high risk of a total party wipe. This adventure promises a thrilling and challenging experience that will test the players' wit, courage, and combat skills.


Lair of the Undying Atropal
Journey into the heart of darkness in the Lair of the Undying. This thrilling Dungeon Delve takes you deep into the cursed lands outside of Zahazaar. Your mission is to investigate the mysterious disappearance of miners who unwittingly stumbled upon a subterranean cavern housing a growing dark power. As you delve deeper into the lair of the enigmatic Quaradissik, you'll face strange creatures, unravel unsettling mysteries, and confront the hive mind of this dark entity. Will you be able to put an end to this growing threat or fall under its sway? Only your abilities and time will tell.


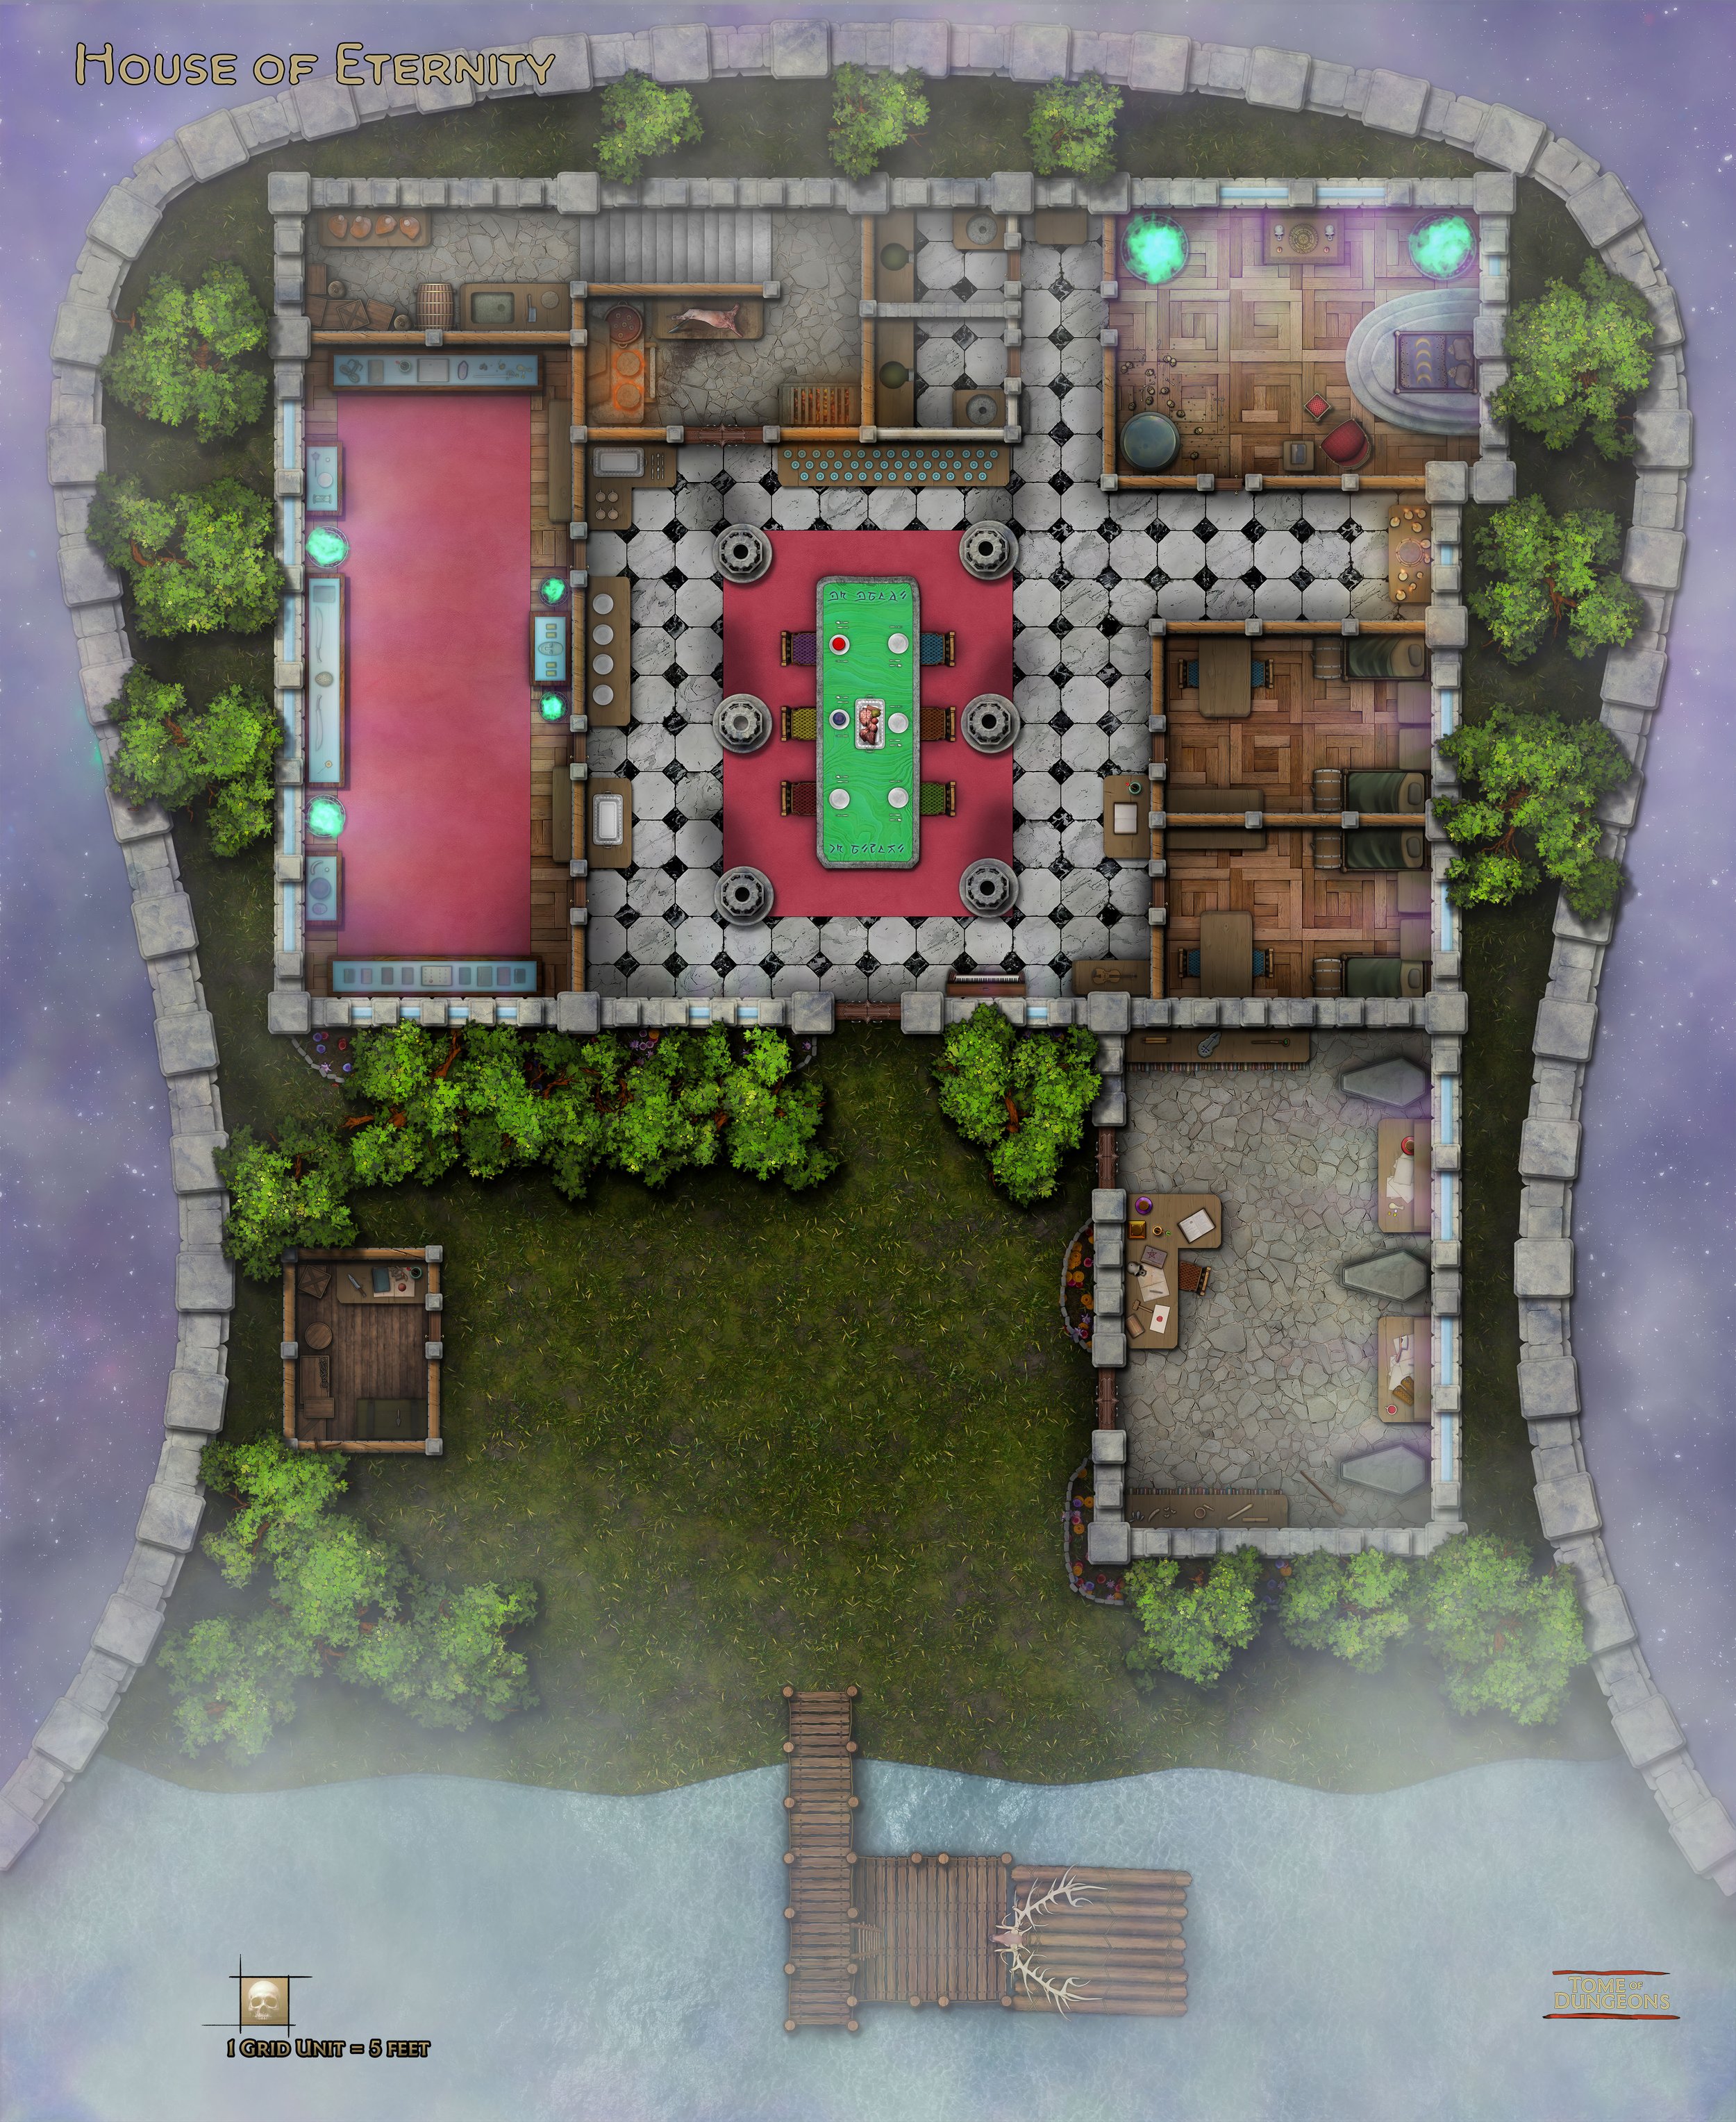
House of Eternity
Travel into the ethereal planes of the underworld in the House of Eternity. This quest is inspired by the Seven Deadly Sins and is optimized for five 14th level player characters. The adventure begins with Sigilae Nouriar, an elf who seeks to resurrect his fallen friend, Iris Naisirdas. The only way to do this is to impress the Lords of Death and ask for Iris's soul to be released. The adventure takes place across two sections: The River of Lethe and the House of Death. The characters must navigate through a series of challenges, combat encounters, and skill checks to reach their goal. This adventure offers a unique blend of exploration, social interaction, and combat.


Chronos
Journey through time in the "Chronos" adventure, designed for epic level 20 characters. Summoned by Chronos, the god of time, your party will traverse the ancient past and distant future to retrieve shards of a powerful artifact, the timeseal and potentially become the next gof of time themselves! This adventure, filled with combat challenges, puzzles, and riddles, will test your party's strength and wit. Will you prove worthy to take up the mantle of the guardian of the timescape?


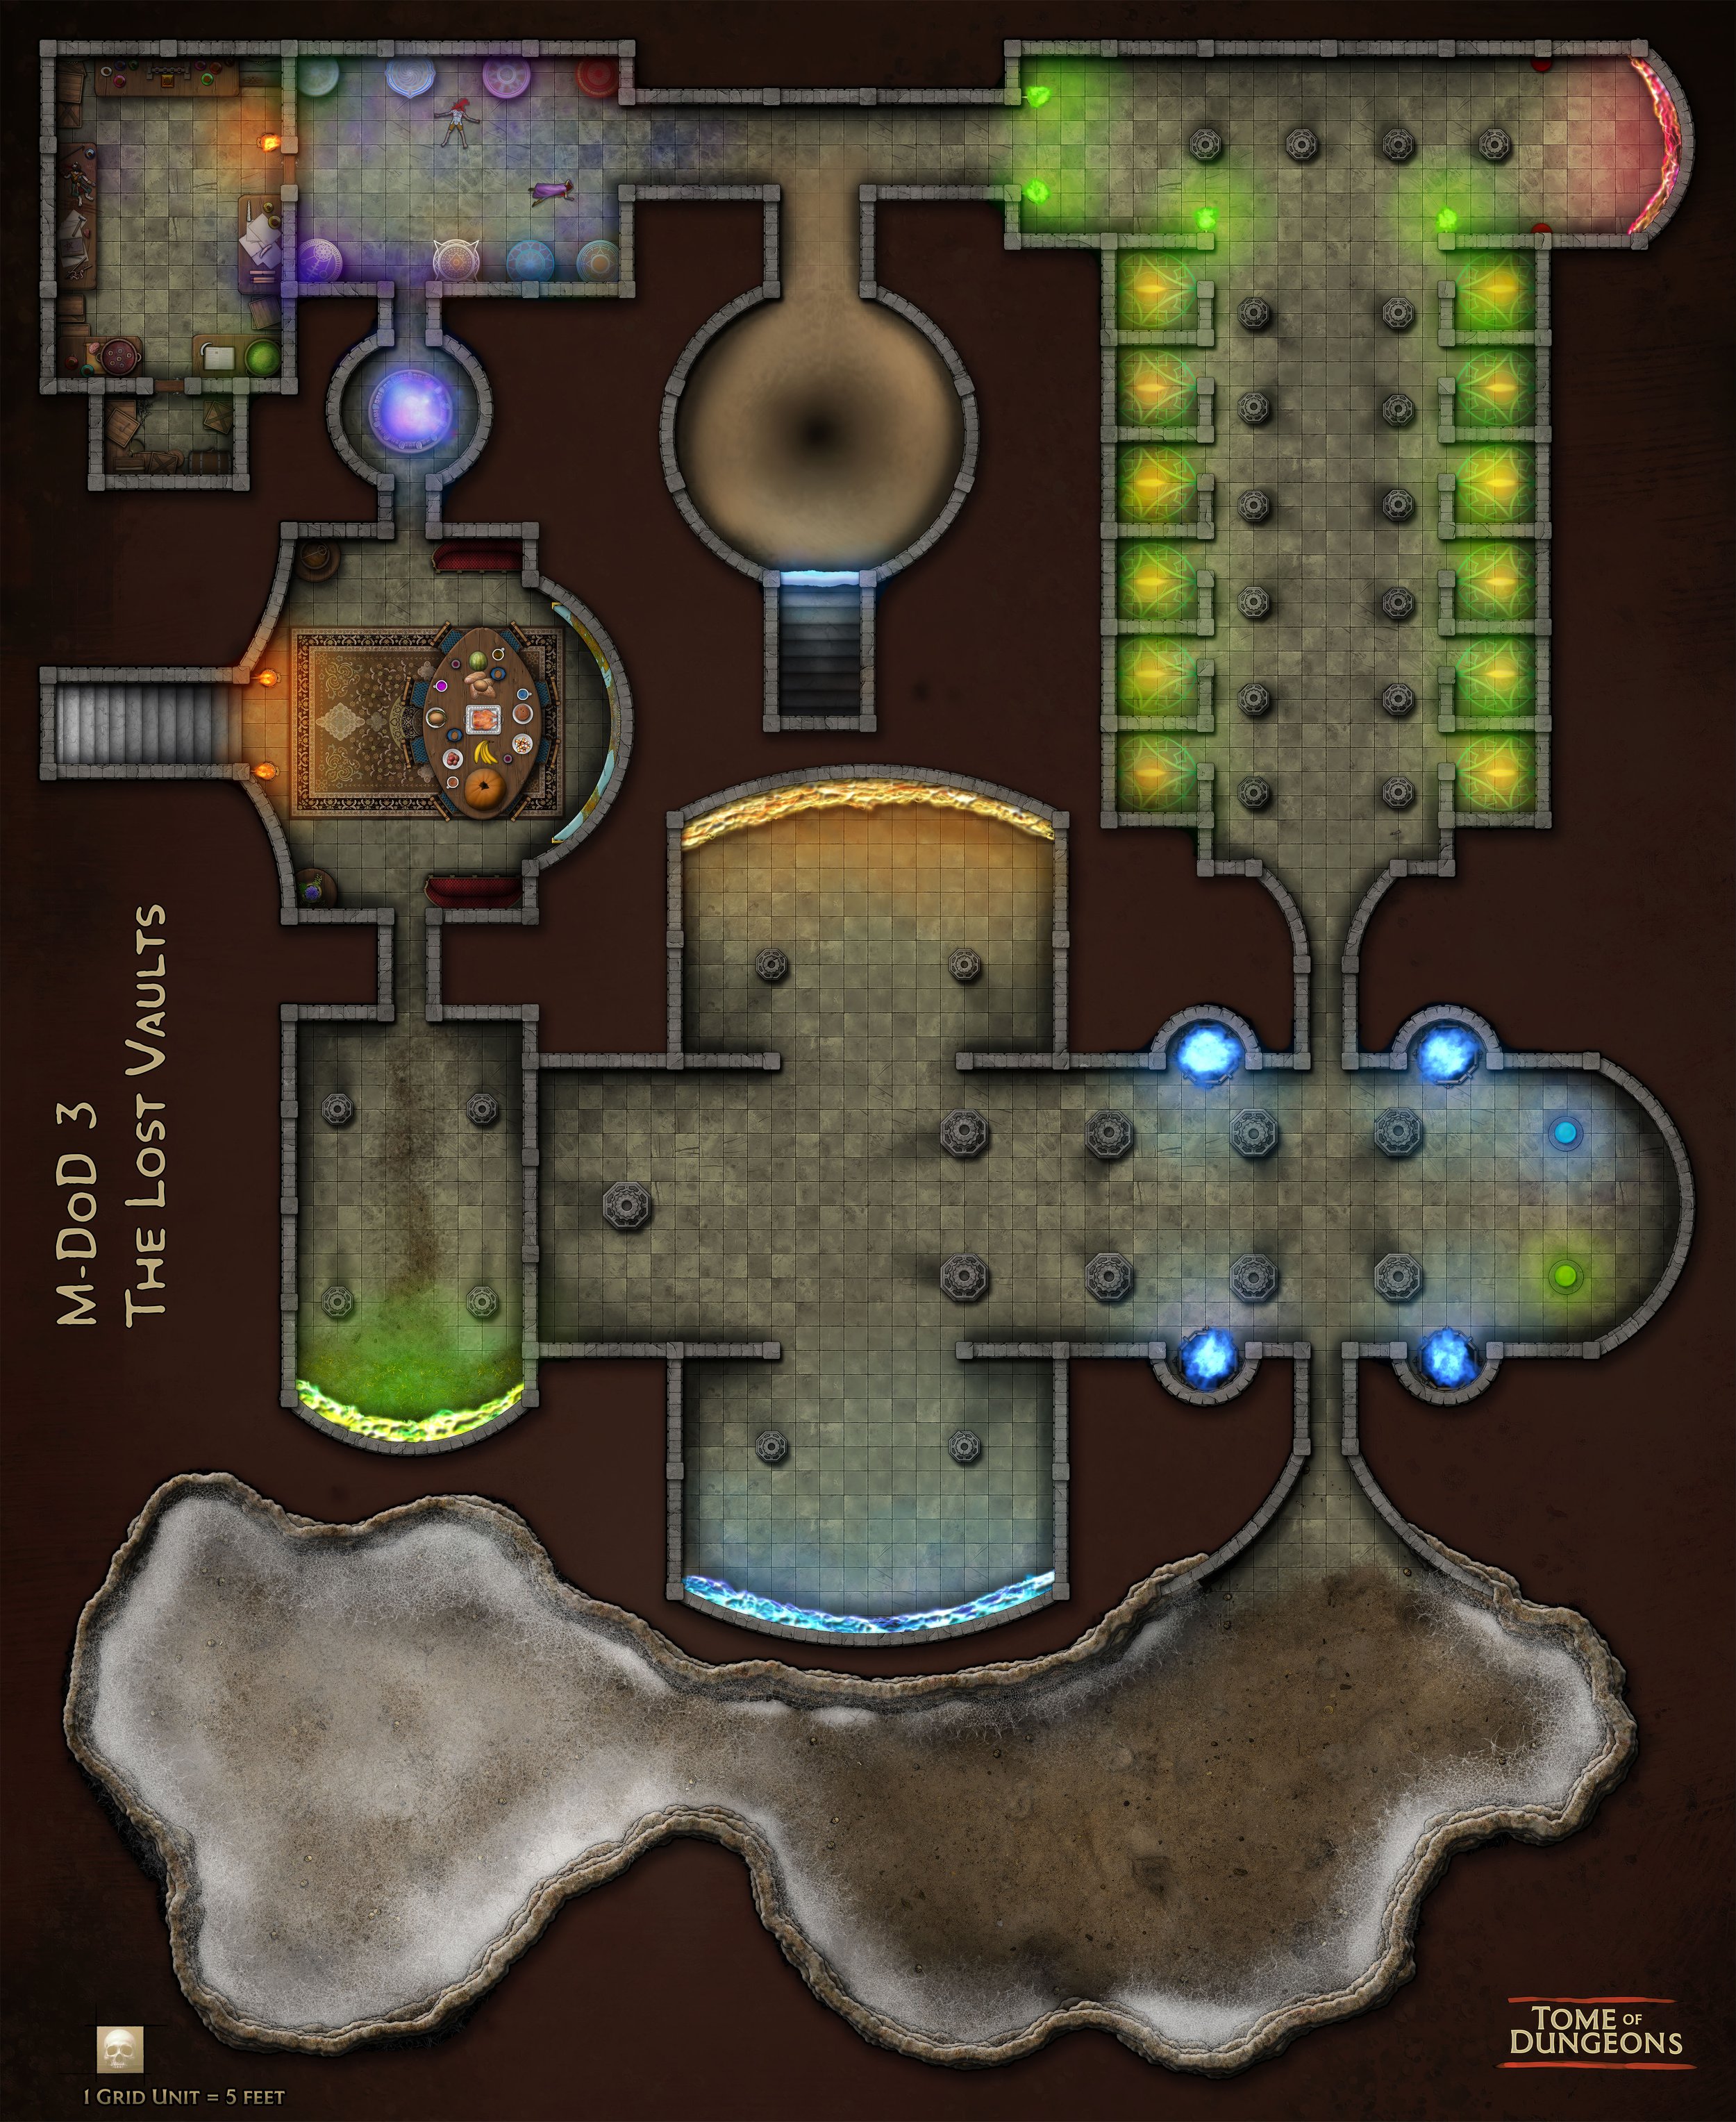
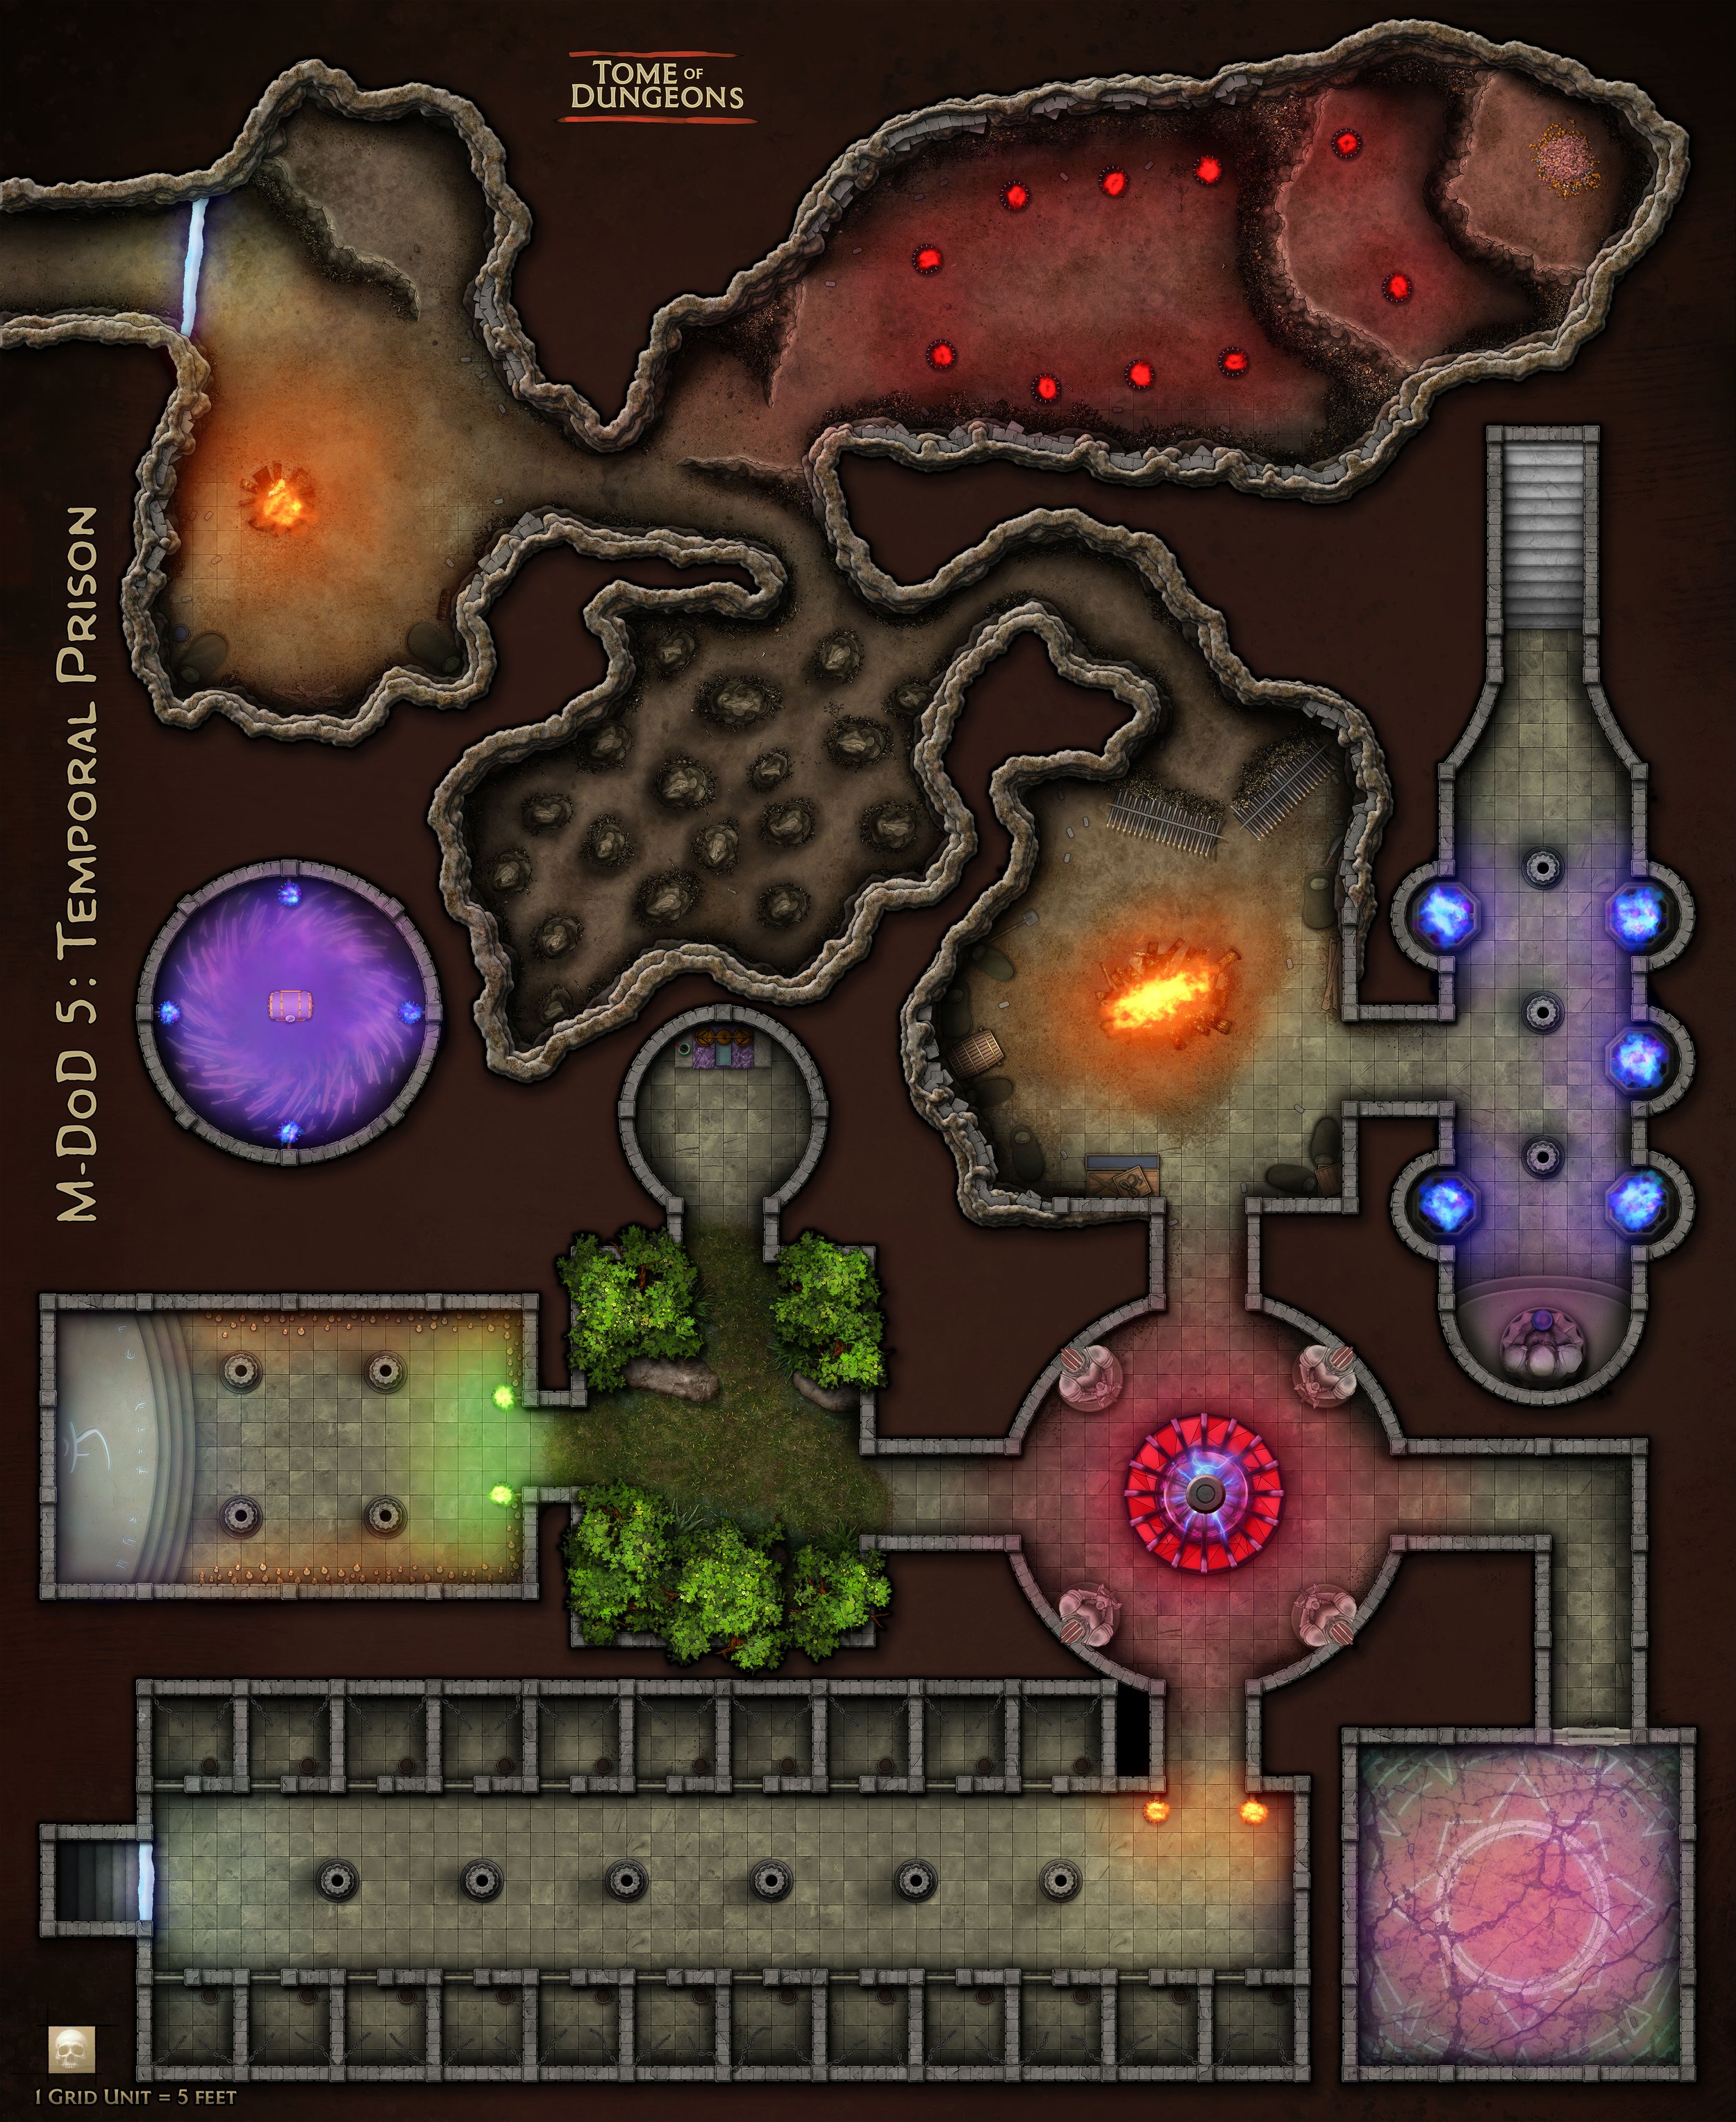
Mega Dungeon of Doom
Dare to venture into the Mega Dungeon of Doom, a treacherous maze designed by the nefarious wizard, Magus Skylord. Once a grand dwarven palace, then a formidable prison, it now serves as the sinister lair of Skylord, housing his most hazardous experiments and priceless treasures. Each tier of this dungeon, from the Dwarven Ruins to the Planar Workshop, poses a distinct challenge, pushing even the most experienced adventurers to their limits. Can you navigate the deadly traps, confront monstrous creatures, and withstand the dungeon's oppressive atmosphere, or will you become another lost soul within its formidable walls?